How to Document Sidewalk Hazards Before Repairs
Updated: Sep 15
A single vertical offset of one-quarter inch can create an accessibility barrier and a preventable liability exposure. When teams document sidewalk hazards before repairs, they create the evidence needed to prioritize work, define scope, and verify results.
Document sidewalk hazards to build a clear roadmap for repairs, support defensible risk management, and help protect your organization from costly claims. This process begins with a full field survey that maps every vertical offset of one-quarter inch or higher using precise measurements and location data. Each entry must include the exact location and clear photos taken from a consistent angle to ensure your maintenance team can find and fix every defect. Effective documentation of sidewalk hazards needs specific measurements to compare against federal ADA standards. By keeping a record of every defect, you turn a repair job into a data-driven asset management plan that keeps pedestrians safe and reduces long-term liability.
Managers sometimes skip these steps to save time, but a lack of records creates gaps in a safety program. Understanding why hazard documentation matters before repairs helps justify the time spent in the field. The process begins with a look at how data protects the maintenance budget.
Why hazard documentation matters before repairs
Starting a repair job without a plan can lead to high costs and missed spots. Before you fix any concrete, you must document sidewalk hazards to know where the biggest risks are. This helps direct maintenance funds efficiently and protect pedestrians. It also allows you to track asset condition and maintenance history over many years.
A solid record-keeping plan includes more than just a list of cracks. You should gather several key pieces of data for every trip risk you find:
GPS or street address for the exact location of the hazard.
Photos that show the height and width of the vertical gap.
Notes on natural factors, such as tree roots that push up the path.
A rank of how bad the risk is based on traffic and hazard size.
Build a clear compliance record
State and local groups have a duty to find and fix barriers in public areas. A full survey shows that you are following the rules of the law. These records act as the base for any good sidewalk accessibility compliance plan. By tracking every issue, you show that you care about keeping paths open for all and follow U.S. rules.
The ADA Best Practices Tool Kit says that site reviews are the best way to stay in line with the law. When you document sidewalk hazards, you should record the exact size of each gap. This data helps you compare current states against set standards to find red flags. If you lack these records, you may face fines that range from $4,000 to $75,000 per event.
Rank safety and budget
Some groups have limited funds for sidewalk care. You cannot fix every crack at once, so you must decide what to fix first. Using GIS tools to map out hazards lets you see the whole picture of your paths. You can rank tasks by how bad the trip risk is or how many people walk there. This data-driven way to document sidewalk hazards ensures you spend your budget where it helps the most.
Good records also help you talk to city leaders about your needs. A visual map of the state of your paths makes it easier to get the funds you need for repairs. You can group tasks by danger level: low, medium, or high. This helps you handle the worst spots first. This plan keeps your paths safe while making the best use of every dollar. It also helps you see which areas need the most care over time.
Reduce liability with photo proof
If someone trips on your land, you need proof of what you did to keep it safe. Taking photos of hazards before and after a fix is vital for your defense. Clear photo records show that you took the right steps to find and fix trip risks. This proof can save you from high costs and legal trouble if a claim arises in court.
For these photos to work well, you should take them from the same angle both times. This allows for a fair look at the repair and proves that the hazard is gone. Using a steady scale in every shot makes the proof much stronger. Keeping a past of these checks and fixes is key for long-term safety and asset care. It shows a pattern of work that protects both the walkers and the land owner from harm.
How to document sidewalk hazards in the field
Safe sidewalks start with clear data. When you document sidewalk hazards, you create a road map for repair. This work helps cities and owners meet rules set by the Americans with Disabilities Act. Good notes in the field make sure no trip risk is missed during the fix.
Field team prep
Before you start, gather your tools. You need a way to measure height, a camera, and a map or GPS tool. A simple ruler works, but digital tools are faster. Make sure your team knows the goal. Any vertical lip over 1/4 inch is a hazard that needs a fix.
Planning your route saves time. Use a map to mark where you will walk each day. This keeps the work on track and makes sure you cover all paths. Team safety is also key. Wear bright vests so drivers can see you while you work on the curb.
Collect site data
As you walk, look for cracks and lips in the concrete. When you find a trip hazard, give it a unique ID number. This number stays with the hazard from the start of the survey to the final repair. It helps you track the work in your files.
Take a photo of each spot. One shot should show the hazard close up with a ruler to show the size. A second shot should show where it is on the block. These photos provide proof of the risk and help the repair crew find the right spot later.
- Check the site:
Walk the path and find any vertical lip or gap in the concrete.
- Measure the risk:
Use a tool to find the exact height of the trip hazard.
- Mark the spot:
Use chalk or paint to mark the hazard so others can find it.
- Take photos:
Get a close shot of the height and a wide shot of the area.
- Log the data:
Write down the ID, height, and location for each hazard found.
- Review the log:
Check your notes at the end of the day to make sure the data is clear.
Use GIS for better logs
Smart logs use GIS to map each hazard. This lets you see all the risks on one digital map. You can then pick which repairs to do first based on how many people use the path. A good commercial trip hazard removal planning should always link data to a map.
Mapping hazards helps with long-term plans. You can track how concrete moves over time in your area. This data helps you spend your budget on the most dangerous spots first. It also shows that you are working hard to maintain ADA sidewalk compliance for all users.
What should every sidewalk hazard record include?
Keeping good records is a key part of sidewalk asset management. It is not just about finding cracks. It is about creating a data-driven plan to keep people safe and reduce legal risks. To document sidewalk hazards the right way, your team needs a set of clear rules. Every record should tell a full story. It needs to show where the problem is, how big it is, and how to fix it. This data helps you spend your budget where it will do the most good.
Clear location data and setting
The first thing every record needs is an exact spot. You can use a street address, but GPS points are better. Using GPS lets you map your sidewalk path in a GIS system. This makes it easy for repair crews to find the exact slab that needs work. It also helps city leaders see which areas have the most issues.
You should also note the setting of the area. Is the hazard in a busy spot like a city center? Is it near a school or a home for seniors? These details are very helpful when you need to rank repairs. Spots with more walkers should often be fixed first. Including these details in your record shows you are thinking about public safety and risk.
Detailed measurements and defect type
Next, your record must list the type of flaw and its size. Most sidewalk hazards are vertical rises. This is when one concrete slab sits higher than the slab next to it. You must measure the height of this rise with care. According to federal accessibility survey standards, even a small rise can be a barrier. ADA rules say a hazard is any vertical rise of 1/4 inch or more.
Your team should measure the full width and length of the hazard too. This data helps you pick the best way to fix the path. For many trip hazards, precision slicing is the fastest and cheapest choice. It creates a smooth slope without the need to replace the whole slab. Recording these sizes allows you to get exact cost estimates for the work.
Severity levels and photo proof
A good record should group hazards by how bad they are. You can use a simple scale like low, medium, and high. This helps you rank the work based on the risk of a fall. A high-risk hazard in a busy area should be a top priority. This method ensures you use your limited funds in the smartest way possible.
Finally, every hazard record must include high-quality photos. You should take a photo of the hazard before any work starts. Make sure to use a ruler in the shot to show the size of the rise. These photos help with ADA sidewalk compliance and protect you from legal claims. Once the fix is done, take an "after" photo from the same spot. Having both photos proves you found the risk and fixed it. This record is a vital part of long-term asset management.
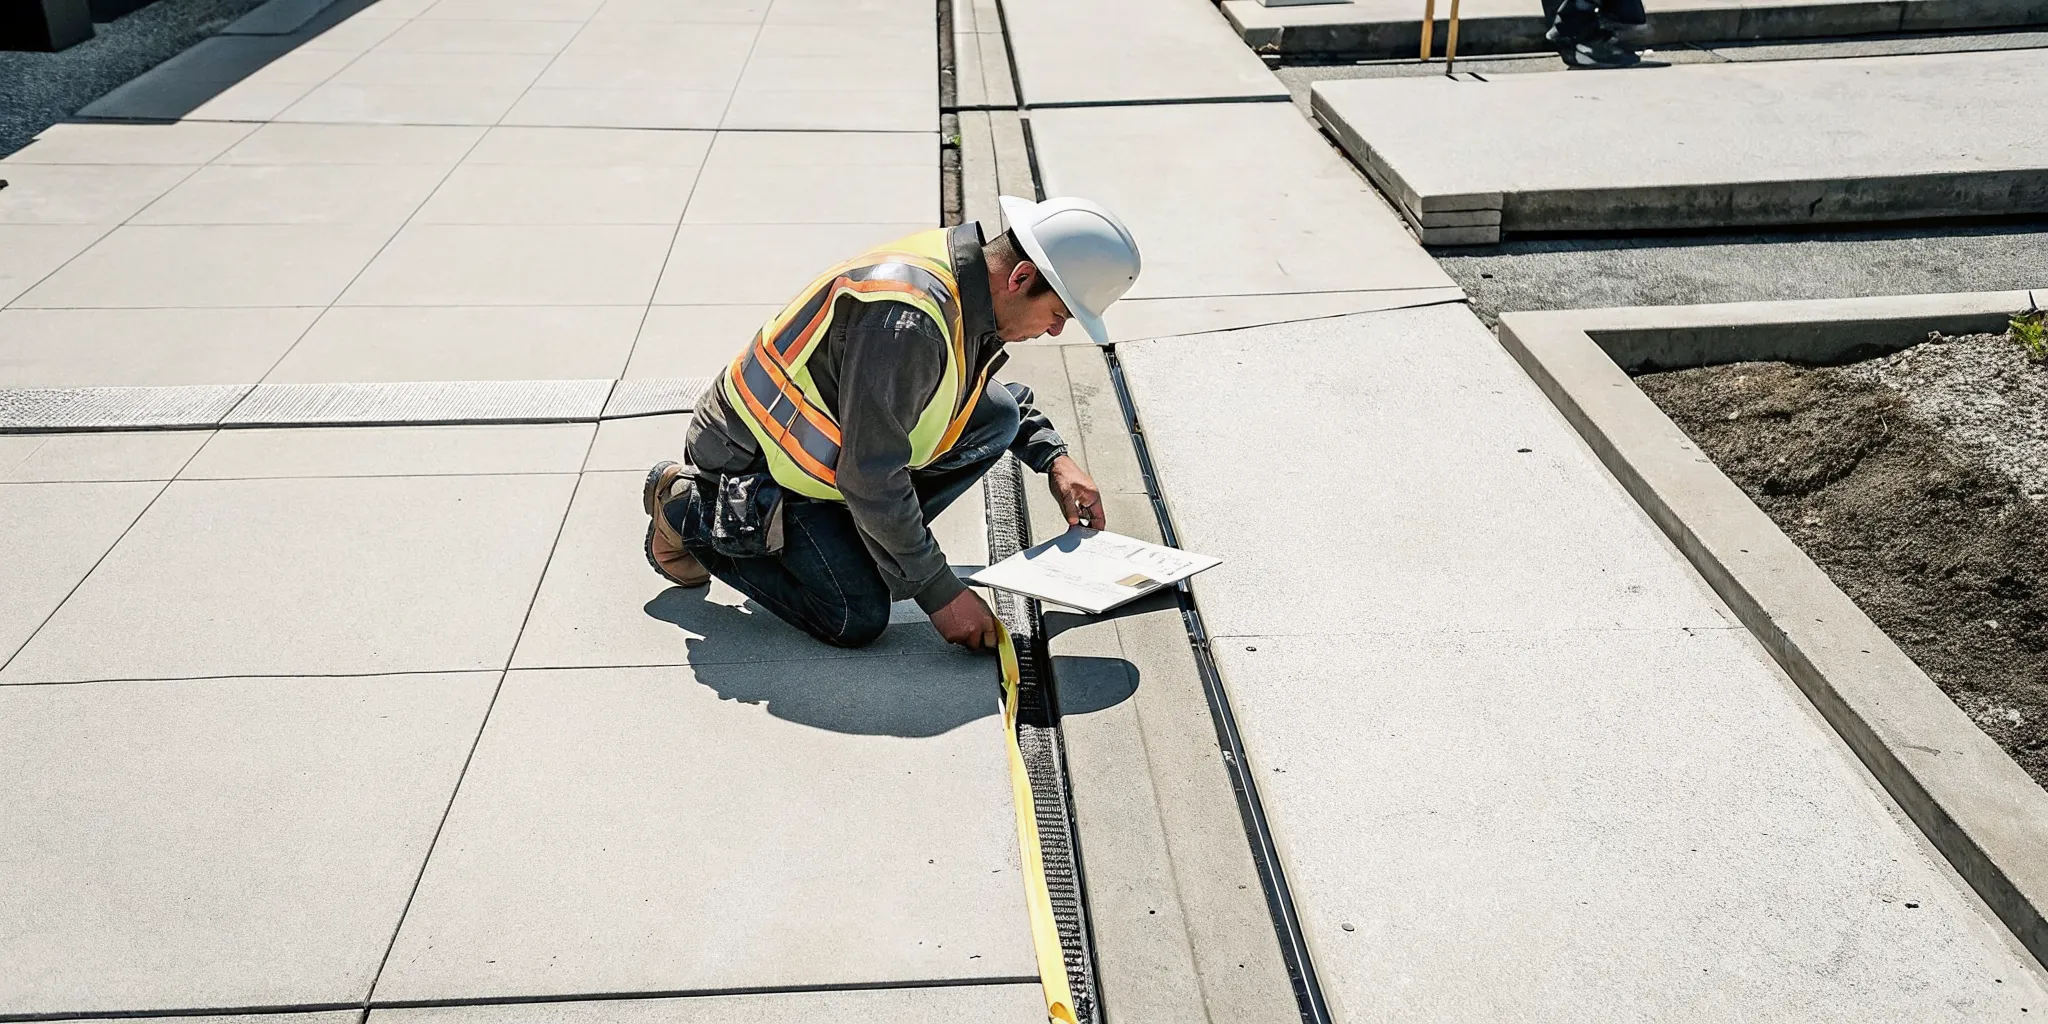
Consistent measurements and photographs create an actionable record for repair planning.
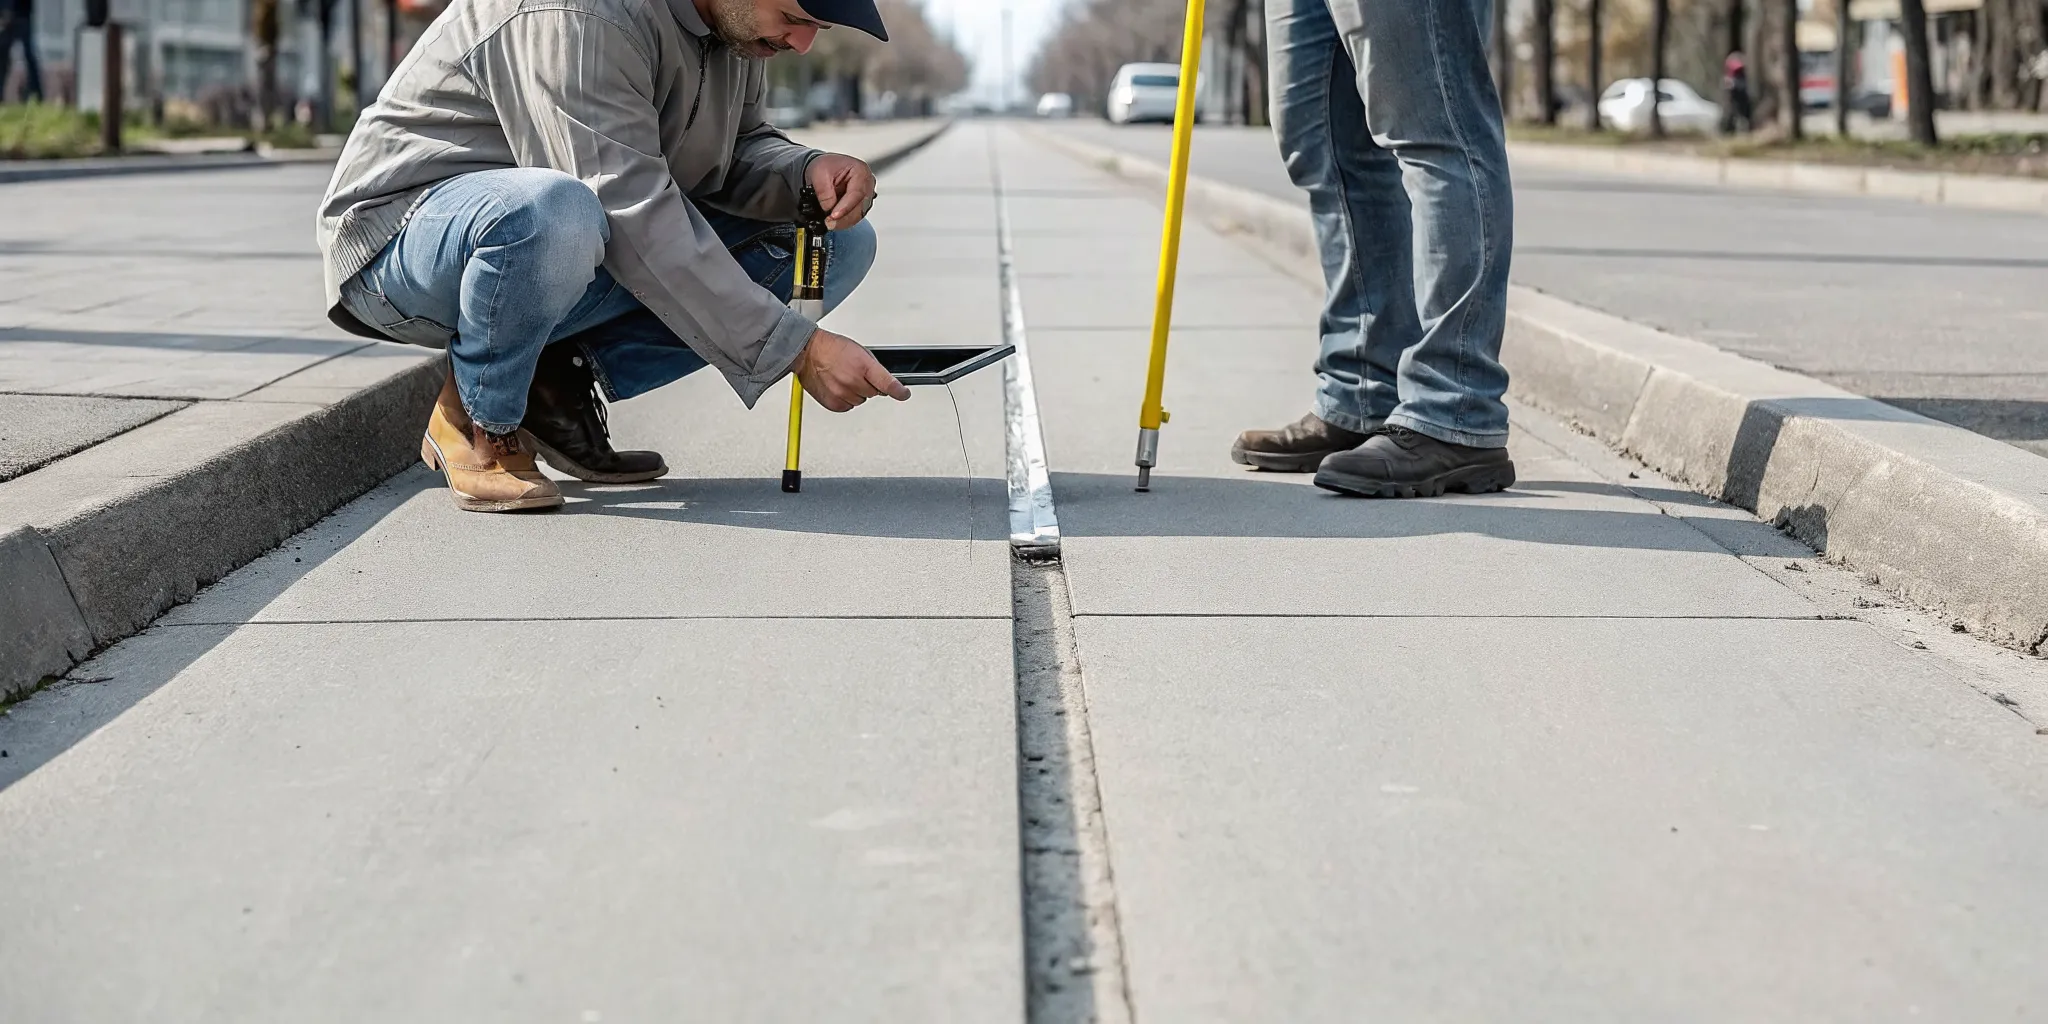
Pre-repair documentation helps teams verify location, severity, and repair priority.
How should you photograph sidewalk hazards?
To fully document sidewalk hazards, you need a clear plan. Photos provide proof of risk and help teams find the right fix. A good photo set shows where the hazard is and how big it has become. This proof is key for safe sidewalk care.
Capturing the full context
The first step in your photo plan is to show the spot. Take a wide shot from about ten feet away to show the whole area. This helps repair crews find the exact spot later. It also shows the path around the hazard.
When you record these risks, you must include nearby signs or marks. These visual cues make it easy to map the area. Use these marks as a guide for your survey teams.
You should also take an approach shot. Stand where a person walking would see the trip hazard. This view helps show why the spot is a risk to public safety. Using a clear angle is vital for sidewalk inspection records.
It allows you to see how the concrete has shifted or cracked over time. Always shoot from the same side to keep your records clear. This fixed view makes it easy to compare old and new shots.
Using reference tools for scale
A photo without scale is hard to use for planning. You need to show the exact size of the vertical shift. Place a ruler or a coin next to the hazard before you take the close-up shot.
This provides a clear scale for anyone who looks at the file later. Measuring the length and width of the shift is also a best practice. It gives the team the data they need to plan the work.
For true data, take photos from a fixed height. This helps you compare different hazards across your site. The Americans with Disabilities Act (ADA) has strict rules for walkway safety.
State and local groups must conduct surveys to find and fix these blocks. Using a tool like a level or a measuring tape in your photo makes the risk clear to everyone. It turns a simple photo into a key tool for safety.
Documenting for liability protection
High-quality photos are your best defense against legal claims. They prove that you are tracking risks on your site. Every file should have a date and a GPS tag.
This spot data is key for GIS tools. It links each photo to a specific point on your map. This makes your asset data more useful and easy to share.
Keep your photo files set up by address or site name. This makes it simple to find them if you need to prove a repair was done. Taking a "before" photo from the same spot as your "after" shot is a smart move.
It shows that you took action to fix the trip hazard with precision cutting. This clear proof of work helps reduce liability and keeps your walkways safe for all users. Safe paths are the goal of every good repair plan.
How to prioritize documented hazards for repair
Once you document sidewalk hazards, the next step is to decide which ones to fix first. Most municipalities and property owners have limited funds, so a structured prioritization plan is essential. Evaluate each hazard's severity and the amount of pedestrian traffic at its location. Clear repair-timing criteria help your organization manage risk and protect pedestrians.
Assessing hazard severity
Severity is based on the height of the vertical lift. Hazards are often any lift over 1/4 inch. A small lift may be a low risk, but a lift over 2 inches is a high priority. Measuring the length and width of the lift also helps you pick the right fix. Large lifts may need different tools than small ones. You can find more details in our sidewalk inspection guide.
Evaluating pedestrian traffic
Location matters just as much as the size of the hazard. A small lift near a school or hospital is more dangerous than a big one on a quiet path. High-traffic zones like business districts should be at the top of your list. You should also look for areas where people with mobility aids travel often. This ensures you meet ADA sidewalk compliance standards for everyone.
Comparing repair priorities
To help you plan, use a simple system to rank your tasks. This table shows how to group hazards based on risk and usage levels. By using data from your surveys, you can spend your budget where it helps the most. State and local groups often use surveys to find and fix these barriers to stay in compliance with federal rules.
Priority Level | Observed Condition | Typical Location | Repair Timeline |
Immediate | Severe defect or immediate access concern | School zones, hospital entrances | Follow the organization's urgent-response policy |
High | Significant defect with frequent pedestrian exposure | Main street business districts | Prioritize in the active repair plan |
Medium | Moderate defect with lower exposure | Residential side streets | Schedule according to policy and resources |
Low | Minor observed change requiring follow-up | Low-use utility paths | Monitor at the organization's chosen interval |
Using a digital tool can make this ranking much faster. Mapping tools help you see where repairs are needed most. This data-driven approach shows exactly how you are reducing risk. It also gives you a clear record if you ever face a legal claim. You can learn more about trip hazard sidewalk repair to protect your property.
Turning documentation into a repair-ready scope
Once you document sidewalk hazards, the next step is to build a repair plan. This plan turns raw data into a set of clear tasks for your crews. A strong scope helps you fix the most urgent spots first while you stay within your budget. It also creates a record that protects you from legal risk. Without a clear scope, your repair teams may waste time or miss critical hazards.
Prioritize and group repairs
To start, you must decide which hazards need a fast fix. Most teams follow the rules in the ADA accessibility survey guide. These rules say that any vertical lift over 1/4 inch is a trip hazard. You should sort your list by how bad the hazard is and where it is found. High-risk spots often include school zones or busy downtown streets. Sorting hazards this way ensures you use your funds where they help the most. You should also group repairs by block or area to save on fuel and labor costs.
Select the right fix
Not every sidewalk crack needs the same fix. For many vertical lifts, precision concrete cutting is the best choice. This method uses a saw to slice away the hazard and create a smooth, safe slope. It is often 50-90% cheaper than removing and replacing the whole slab. For your scope, you should list each spot and the method you want to use. A solid scope also makes it easy to compare bids from contractors. This ensures you get a fair price for a fast fix while you stay in line with ADA sidewalk compliance standards. A solid scope for each site should include these facts:
The exact GPS location or address of the trip hazard.
The height and width of the vertical lift or gap.
Clear photos of the spot taken from the same angle.
A ranking of the safety risk to those who walk there.
Track results with evidence
A repair scope is not done until you prove the work is complete. You must keep records of the before and after state for every spot. High-quality photos from the same angle provide the best proof of a job well done. This evidence is vital for checking that the work meets safety standards. It also acts as a shield against future legal claims. By matching your repair records with your first notes, you can see the true value of your work. This helps you plan better for future sidewalk care.
Common sidewalk hazard documentation mistakes
When you document sidewalk hazards, small errors in data can lead to big legal risks. One of the most common mistakes is using mixed tools or ways to measure the height of offsets. Without a clear set of rules, two staff members might record the same hazard with mixed results. As stated in the ADA rules, state and local towns must use exact survey forms to collect data. These forms help you keep track of facts in the same way. If your team does not use one method, your repair plan will be flawed. You need to record the full size of every hazard, including its length and width, to pick the right fix.
Mixed data and gaps in records
Mixed data often comes from a lack of training or poor tools. Some teams use simple rulers while others use digital tools. This leads to data that does not match and makes it hard to rank repairs by how bad they are. If you do not have a clear meaning of what counts as a trip hazard, you might miss unsafe spots. If multiple people record the same spots, you will have extra files. This often happens when there is no clear owner for each zone. Clear data helps you spend your budget where it is needed most.
Poor photo proof and missing place info
Photos are vital for proof of repair, but many teams take poor shots. A common error is taking a photo that is too close to show where the hazard is. Without context like a nearby building or sign, a repair crew may not find the spot. You should also take photos from the same angle before and after the work. This shows that the hazard is truly gone and helps protect you from lawsuits. Also, many teams forget to record the GPS data or a street address. Every ADA sidewalk compliance check should include exact spot data so workers can find the spot fast.
Failing to close out repair records
Documentation work does not end when the crew finishes the project. A significant mistake is failing to update records when a repair is complete. Maintain a clear maintenance history showing when and how each hazard was addressed. This record is essential to long-term asset management. It demonstrates that your organization follows a consistent public-safety plan. Track the cost of each repair to evaluate return on investment. Without closeout updates, records may continue to show hazards that no longer exist. Inaccurate records make it more difficult to plan future budgets or evaluate results.
Frequently Asked Questions
What is considered a trip hazard on a sidewalk?
A trip hazard is often seen as a vertical shift in a sidewalk path. According to ADA standards, any edge higher than 1/4 inch is a hazard that needs fixing. Tracking these spots is the first step in making walkways safe for all people. This helps property owners and cities manage risk while following federal laws for public paths.
Why is it important to document sidewalk hazards?
Proper data helps you rank repair work based on how bad the hazards are. It also helps with budget plans by showing where the most urgent needs exist across a city. According to Precision Concrete Cutting, photo proof before and after a repair shows the work is done. Gathering data in a clear way is the best path to manage assets and keep walks safe for everyone.
How do you identify sidewalk hazards before they become a problem?
You can find sidewalk issues early by looking for uneven joints, cracks, or tree roots lifting the concrete. Many teams now use digital tools to track these problems in real time. According to experts, moving from paper forms to digital tools makes tracking faster and more precise. Finding these small shifts early allows for quick slicing or cutting repairs before they become a major risk for the public.
Who is responsible for documenting sidewalk hazards?
The duty to track sidewalk issues often falls on the local city or the property owner. State and local groups must do surveys to find paths that are hard to use. According to ADA guidelines, these surveys are a key part of following federal rules. Writing down your work shows you are trying to keep walks safe and meet legal needs for your community.
Ready to schedule a professional sidewalk assessment?
Systematic hazard documentation gives municipalities, HOAs, and property managers a reliable basis for prioritizing work, protecting pedestrians, and planning maintenance budgets. Precision Concrete Cutting can assess documented hazards, recommend an efficient repair scope, and remove qualifying trip hazards with a patented precision-cutting process. Review our sidewalk safety services to understand the assessment and repair process.
Ready to turn your field records into an actionable repair plan? Call (801) 373.6060 to schedule a sidewalk assessment.



Comments